Design & Artwork
f you are unsure about supplying us artwork for routed letters logos and shapes, we can create the drawings for you in our in-house Design Studio under the exacting eye of Stephanie, our Head of Design.
Any files you supply MUST be in a Vector Format. Examples are: EPS, Ai, Vectorised CDR files and DXF files when set to our specification.
All fonts must be converted to Curves/Paths. Our router actually uses the DXF file type to cut but only of the correct settings. So please ask if in doubt!
We can NOT use bitmap files like JPG or BMP for router cutting.
Maximum Size
Our ABSOLUTE MAXIMUM size for any router-cut shape is 2400mm x 1200mm which come out of a master sheet of 2440mm x 1220mm, but this depends upon the actual shape concerned - Ask us for advice when near these sizes.
Fixing Methods
Letters, Logos and Shapes that require fixing to walls or other substrates can be fixed in a few ways as shown below:-
DOUBLE-SIDED TAPE
This is ideal when fixing onto other flat substrates like Acrylic Backing Panels. The resultant finish gives a letter/shape that is sat on the surface of the backing material and relying upon the thickness of the letter to give a slight 3D appearance.
STAND-OFF LOCATOR FIXINGS
These fixings consist of a Male & Female set with the Male part glued to the rear of the letter and the Female part screwed to the backing substrate or wall. The Male part is then Push-fitted into the Female part giving a resultant finish of the letter floating above the surface of the backing panel/substrate or wall. This creates a shadow effect in certain lights and affords a Blind Fixing method. When using this method of fixing it is necessary to use a Fixing Template to establish where to fix the Female parts on the backing substrate or wall.
We can supply a Paper Fixing Template when your cut-out letters are supplied with our Stand-Off Locators. When this fixing method is ordered we will supply the letters/logo with the Male part locators glued to the rear where we think offers the best support for the shape. We use two types of locator fixing and will select the right size and type of locator to suit the size of letter.
IMPORTANT
LOCATORS HAVE A SHARP POINT ON THEM - DO NOT PLACE LETTERS ON TOP OF EACH OTHER OR ONTO AN UNPROTECTED SURFACE AS THIS POINT CAN SCRATCH THE SURFACE OR THE LETTER UNDERNEATH.

HOW TO FIX LOCATORS
1 - Affix the Paper Template in the position required by taping it in position.
2 - If fixing to a wall or similar hard backing substrate it is necessary to drill either a pilot hole or hole to accommodate a Wall Plug when fixing to a wall.
3 - Screw the Female Locators at ALL the marked centre points.
4 - Before screwing up fully, remove (Tear it away) the paper Fixing Template.
5 - Now screw the Female parts up until they can just be moved slightly yet lying flat on the backing substrate/wall. By leaving the fitting loose it enables some movement when aligning the Male part.
6 - Now position the letter by lining-up the Locators and push the letter firmly at the position of each of the locators. When they are fully pressed home a click can often be heard.
GLUE FIXING
This option is generally used when fixing Foam PVC or Acrylic Letters to Acrylic backing substrate when an Acrylic Glue called “Tensol Cement”. This is a two-part mixture and gives an extremely solid fixing as it literally melts the two pieces together.
Fixing Templates
PAPER FIXING TEMPLATE
This is invaluable for fixing and speeds the job up considerably.
Please ensure that you order a Paper Fixing Template when you order Letters or any shape that has to be mounted with the correct spacing between the letters or shapes. We make the templates by producing a drawing of the letters/logo required and positioning the finished letter/shapes onto the drawing and pressing down, utilising the sharp point on the locator to mark the paper with the centre point, for fixing the locator’s female cup. We then go over this in pen to make it more visible.
TIPS
Whilst we suggest that you use tape to attach the template to a wall or other substrate, this can sometime be difficult to do or may mark the surface that you are putting the template onto. So, be mindful of this and perhaps do a test beforehand.
One alternative is to position and hold the template on to the wall and get a partner to drill and/or fasten a few of the fixings and use the female fixing cup to hold the template in position. Then continue with the rest of the fixings.

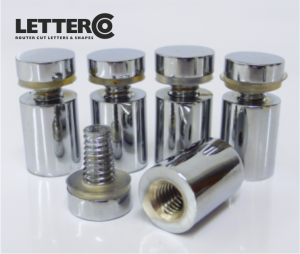
Stand-Off Plaque Fixings
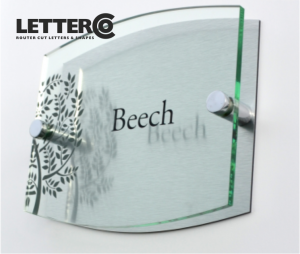
Other Fixing Methods
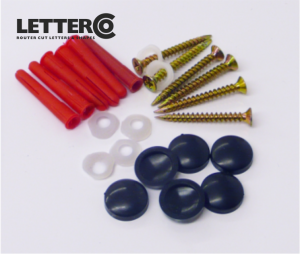
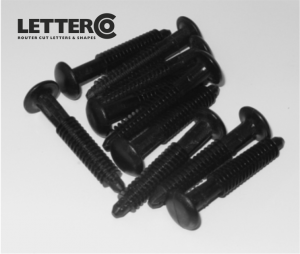
Other fixing methods include “Wall Plugs, Screws & Caps” and “Hammer-in Plug Fixings”. To fix the “Hammer-in Plug Fixings” a 7mm diameter hole is required in the material and a 6mm diameter hole is drilled into the wall - this can be created when the material is routed. The material (eg. Sign or Plaque) is placed on the wall and the Plug is simply hammered into place. This is only suitable for Signs/Plaques that are to be fitted flush to the wall. They are not suitable for producing a “Stand-Off” effect. We can supply fixings when you order the Router-cut material but do remember to order them as they are not just provided.
